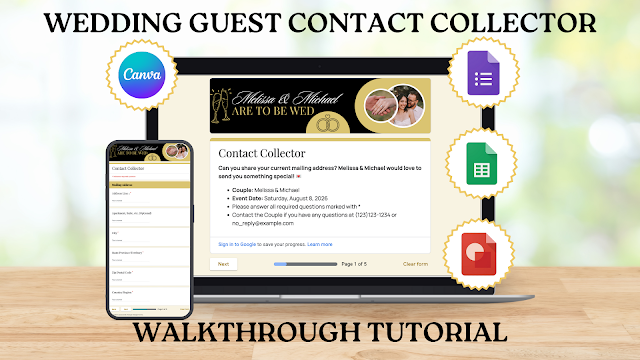
Wedding Planning Contact Collector: Complete Setup Guide
Planning a wedding involves countless details, but one of the most important tasks is collecting guest contact information. Whether you're sending save-the-dates, invitations, or thank you cards, having organized guest details makes everything smoother.
That's where the Wedding Planning Contact Collector template comes in. This Google Forms template transforms what used to be a tedious manual process into an automated system that works for you. Let's walk through every step to get your contact collector up and running perfectly.
Please Note: This blog is a walkthrough tutorial for my Wedding Guest List Contact Collector Questionnaire digital product. You can purchase it on Etsy or on my store. I've also recorded a video walkthrough tutorial that you can watch here or on YouTube.
What You Get With This Template
When you purchase the Wedding Planning Contact Collector, you receive four powerful tools:
- Google Forms template - The main questionnaire your guests will complete
- Google Sheets spreadsheet - Your organized contact database
- Google Drawings header templates - Customizable design elements
- Canva header templates - Professional design options
Each component works together to create a seamless experience for both you and your guests. The best part? You only need free Google and Canva accounts to use everything.
Step 1: Getting Everything Set Up
The first step is copying all templates to your accounts. This ensures you have full control over customization and data.
- Click each Google link from your PDF download
- Select "Make a copy" for Google Forms, Google Sheets, and Google Drawings
- Choose "View template" for Canva designs
Important: Rename everything immediately after copying. The templates use "Melissa and Michael" as placeholder names, so replace these with your actual couple names right away.
This simple step prevents confusion later and makes your templates feel personal from the start.
Step 2: Creating Your Custom Headers
Your header design sets the tone for your entire questionnaire. Both Google Drawings and Canva offer easy customization options.
Using Google Drawings:
- Click on the placeholder names and change them to your couple names
- For photos, click "Replace Image" then "Upload from Computer"
- Match your wedding colors by clicking the Paint icon and selecting custom colors
- Customize icons by selecting "Format Options" then "Recolor"
- Change font colors by selecting the text box and clicking the "A" icon
- Download your finished design: File → Download → PNG Image
Using Canva:
- Click on placeholder names and update with your couple names
- Upload your photos directly using the "Upload" button
- Click any colored element to access the color palette
- Use Canva's suggested colors from your uploaded photos
- Download your design: Share → Download → PNG
Step 3: Applying Your Header Design
Once your header is ready, it's time to add it to your Google Form.
- Open your Google Form
- Click "Customize Theme"
- Scroll to the header section
- Remove the placeholder image
- Upload your new Canva or Google Drawings design
Here's something cool: Google Forms automatically extracts colors from your header and suggests matching themes. Choose colors that complement your design for a completely coordinated look.
Step 4: Understanding the Smart Questionnaire Logic
The template includes built-in conditional logic that adapts based on guest responses. This smart feature saves time for both you and your guests.
- If guests select "attending as individual" → They submit the form immediately
- If guests select "attending as couple" or "as a family" → They answer additional questions about other party members
This conditional logic ensures you collect the right information without overwhelming solo guests with unnecessary questions.
Step 5: Customizing Your Questions
The template comes with ready-to-use questions, but customization is simple when needed.
- Click the three dots on any section
- Select "Delete Section"
- Click "Add Section"
- Drag it to your desired location
Important Note: If you delete, add, or rearrange any sections or questions, you'll need to edit the spreadsheet cell formulas to maintain proper data flow.
Before publishing, don't forget to edit the confirmation message in Form Settings with your personal details.
Step 6: Setting Up Your Spreadsheet Dashboard
Your Google Sheet is where the magic happens. This formatted tracker automatically organizes all responses into an easy-to-read format.
- Click Insert → Image → Insert Image in Cell
- Add your header design to personalize the spreadsheet
- Use the Paint icon to match colors from your photos
- Go to Format → Alternating Colors for better readability
⚠️ CRITICAL TIMING: Before vs. After Publishing
Understanding the timing of these steps is absolutely crucial for success. Many users skip this distinction and end up with broken connections that don't work properly.
🔧 BEFORE Publishing Actions (Do These First!)
These steps must be completed before you publish your form and start receiving responses:
Step 7: Linking Your Form to the Spreadsheet
This connection step is crucial for automatic data collection. Many people get confused here, but following these exact steps ensures everything works perfectly.
- In your Google Form, navigate to the "Responses" tab
- Click "Link to Sheets"
- Always choose "Select existing spreadsheet" (not "Create new spreadsheet")
- Navigate to your renamed Wedding Planning Contact Collector spreadsheet
- Click "Insert" to confirm the connection
Step 8: The Critical Tab Naming Step
Here's where most people encounter issues, but you'll be prepared. When Google Forms creates the connection, it generates a new tab called "Form Responses" with a number.
- The new tab should be named "Form Responses 1"
- If it shows as "Form Responses 2" or "Form Responses 3," you must rename it
- Right-click the tab → Rename → Change to exactly "Form Responses 1"
- No extra spaces or variations allowed
You'll know the connection is working when the text and formula in the Contact Collector tab cell F3 appears in color.
⚠️ Why This Order Matters: If you publish first and then try to connect, Google may create additional tabs with different numbers, breaking the formula connections in your spreadsheet.
📤 Publishing Your Form (The Bridge Step)
Step 9: Getting Your Form Live
Getting your form published correctly ensures all guests can access it, regardless of their Google account status.
- Click "Publish" in your form
- Also click "Share" to adjust settings
- Change responder view from "Restricted" to "Anyone with a link"
- Copy the responder link
- Shorten the URL
- Share with your guests via text or email
This dual approach (publishing and sharing) prevents access issues for guests without Google accounts.
✅ AFTER Publishing & Receiving Responses (The Final Activation)
These steps can only be completed after you've received at least one response:
Step 10: Activating the Formula Connection
After publishing and receiving your first responses, you need to activate the formula connection.
- Double-click on cell F3 in the Contact Collector tab
- Click anywhere else in the spreadsheet
- Watch as guest information automatically populates
⚠️ Important: Don't worry if you see #NA errors initially. These disappear after receiving your first response and activating the formula connection.
Why This Step Comes Last: The formulas need actual data to connect to. Without responses in your "Form Responses 1" tab, there's nothing for the formulas to pull from.
Step 11: Using Your Automated Dashboard
Once everything is connected, your spreadsheet becomes a self-updating dashboard that grows with each response.
- Automatic data population from form responses
- Dropdown filter to view individual guest details
- No manual data entry required
- Real-time updates as new responses arrive
The beauty of this system is that it automatically updates whenever you select a different guest from the dropdown menu.
Quick Reference: Two Critical Actions
Remember these two essential steps:
- Before publishing: Rename the Form tab to "Form Responses 1"
- After receiving first responses: Double-click cell F3, then click elsewhere in the spreadsheet
Following these steps ensures your automated system works flawlessly.
Making the Most of Your Contact Collector
With your Wedding Planning Contact Collector fully set up, you now have a powerful tool that makes wedding planning significantly easier. No more chasing guests for addresses or trying to decipher handwritten response cards.
This system automatically organizes all guest information, making it effortless to send save-the-dates, invitations, and thank you cards. The time you save on data collection can be spent on other important wedding planning tasks.
Troubleshooting Common Issues
If you encounter any problems:
- #NA errors: These resolve after receiving your first response and activating the formula
- Data not appearing: Check that the Form Responses tab is named exactly "Form Responses 1"
- Guests can't access form: Ensure sharing settings are set to "Anyone with a link"
Final Thoughts
The Wedding Planning Contact Collector transforms a traditionally tedious task into an automated, efficient process. By following this step-by-step guide, you've created a professional system that will serve you throughout your wedding planning journey.
Remember, the key to success with this template is following the setup steps precisely, especially the tab naming and formula activation steps. Once everything is connected properly, you'll have a powerful automated system that saves hours of manual work.
Have questions about your setup? Don't hesitate to reach out through Etsy or visit my website for additional support. Your wedding planning journey should be joyful, not stressful, and having organized guest information is one less thing to worry about.

